Building a Living Wall
One of my other passions besides fashion is gardening, and since I don't also have a gardening blog, I'm posting the project that I'm most proud of here. It's a living wall that I built in a bland, dead space underneath the staircase behind our house. Invented by Patrick Blanc in Paris, living walls now abound in San Francisco and I was inspired to build mine on a visit to the Academy of Sciences, which has a stunning installation in the central piazza area.

I built the entire wall myself, with the exception of the wooden frame that holds it up, which was Mark's contribution. Many of the plants in the wall were ones I started from cuttings.
Since the area is heavily shaded, the wall is comprised of lots of fuchsias, ferns, and tender vines or creeping ground covers. The black things sticking out at the top are misters that are part of the plumbed drip watering system, which waters the wall for 4 minutes every 6 hours. With living walls it's important not to let them dry out, since the felt medium acts as a soil substitute but doesn't hold water in the same way that a deep planter full of soil does. If you'd like to learn how the wall was constructed, read on.

Below is what the area looked like before; a plain, painted sheet of plywood attached to the back of our neighbor's fence. To this we attached the wooden support frame that Mark built.


Meanwhile, I assembled the materials:


Left to right: industrial grade 1/4" thick recycled felt, rust-proof staples, landscaping fabric. Click each photo for source.
The next step was to attach sheets of corrugated plastic to the frame so as to create a waterproof barrier. Once the frame was completely covered, I caulked the seams to prevent water from seeping through.


 |
| While I was researching, ordering, and assembling all my materials, I had about 40 or 50 cuttings going. This prevented me from having to buy all ~100 of the plants I needed to fill out the wall. I created mini-greenhouses for them out of milk crates wrapped with plastic wrap, which prevents the cuttings from drying out while the new roots are forming. Each cutting was grown in a coconut husk pot, which is biodegradable and which I could put directly into the wall. Of the cuttings I started, maybe a third of them survived; cuttings are tricky. I ended up starting a couple more rounds and had success with several plants with each round. I probably saved $200 - 300 by not buying all the plants from the nursery. |
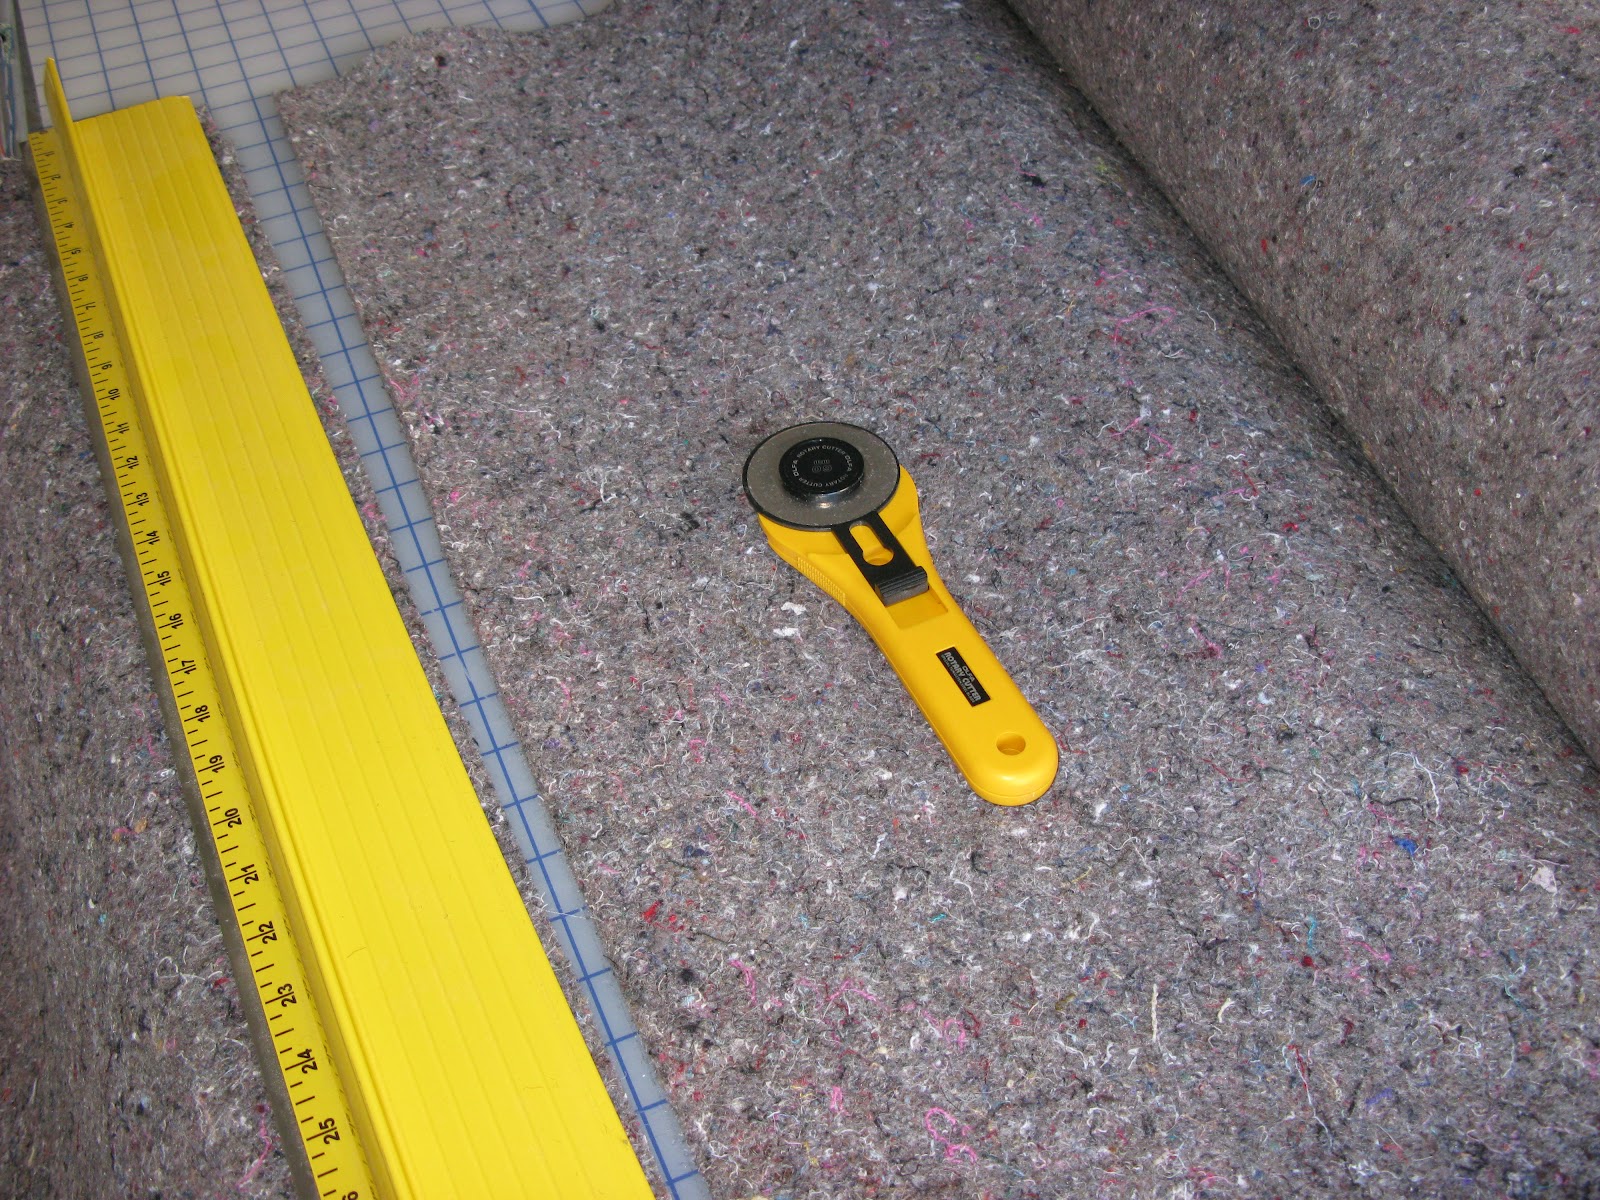 |
| Next I stapled a layer of the landscaping fabric to the wall to help with moisture retention. The next step was to measure and cut the first layer of felt, and staple it to the wall. I quickly learned that a rotary cutter is pretty much the only way to cut that stuff. I also learned to wear long sleeves and gloves while working with it, because it's outrageously itchy. |
 |
| Once the landscape fabric and first layer of felt were in place, I started building the drip watering system, which is nestled between the two layers of felt that ultimately make up the wall. Across the top is a length of 1/4" soaker hose (I spliced in the misters later, because I felt that many of the shade plants would benefit from having water on their leaves), connected to 1/4" tubing, which ultimately I ended up tucking behind the whole assembly. The watering system is controlled by a timer and uses a fertilizer injector (below right; click for source) to keep the plants fed. Under the bottom edge of the living wall is a narrow metal channel that directs the excess water over into another planter so that the water doesn't just run down the wall. Since the concrete wall that it rests on slopes anyway, the channel just sort of sits there and gravity does the rest. I know for indoor walls, capturing and recycling the water is a much bigger deal. |


 |
| The final layer of the wall is a second piece of felt with slits cut in it of various sizes. These create the pockets for the plants to be slipped into. I just sort of eyeballed it and put in larger and smaller slits for the plants that I had. Ultimately it doesn't really matter how large the pocket is for each plant, because the roots spread laterally through the wall as the plant grows, so it isn't as if the plants are constrained to the size of the pockets they're planted in. |
I also added a second layer of landscaping fabric in between the layers of felt, which, if I had it to do over again, I would not repeat. The plants go behind the top layer of felt and the landscape fabric, and in front of the bottom layer of felt. However, the fabric has no stretch to it and had to be cut much larger than the slits in the felt in order to accommodate the plants. It was a huge pain in the ass, and I definitely would not recommend using it for anything but behind both layers of felt as a moisture barrier, if at all.
 |
| Finally, the plants started going in. I quickly realized that the staples do not work at all once you've got a couple of 1/4" layers of felt up. I ended up using coated concrete screws, which worked a lot better. Each plant is removed from the pot (if it isn't biodegradable), and the excess dirt is shaken loose. It helps to carefully break the roots in half and flatten them out so that they slip into the slits more easily. As each plant was put in place, I put a couple of screws around the bottom and sides to create a little pocket. |
 |
| Ta-da! Here's what it looks like today, about 3 months after the plants went in. As you can see, they're filling in nicely and I'm betting by this time next year, the felt will be completely invisible as the plants grow together. The wall adds so much warmth and visual interest, and what used to be sort of a dumpy area is now the highlight of the property. We call this little seating area, "The Grotto." |
DIY Greenwalls (the source of most of my information)
Sunset magazine article
Tumbleweed Traveler -- Uprooted Garden
Living Walls and Vertical Gardens
Environmental Graffiti
posted by Fashion Girl @ 5:53 PM
0 Comments
![]()

0 Comments:
Post a Comment
Subscribe to Post Comments [Atom]
<< Home